30 September 2013

For the Love of Vintage Photos!

One of my fav from my collection
I believe this type of photograph is called
a "Carte de visite". This type of photography
was used prior to Cabinet Cards.
My love for antiques has always included photos, but I just recently began an antique photograph collection. My boyfriend and I went to Santa Cruz back in May which is were I found my first vintage photograph. There is a great Antique shop in downtown Santa Cruz called Mr. Goodie's Antiques & Collectibles that I have to visit each time I'm in the area. You could really spend hours in this store as it's packed with all kinds of antique goodies most of which are in great shape considering how old some of the pieces are. There are a ton of old photos at this shop, but this one in particular captivated me when I first saw it and I just knew I had to have it.

First vintage photo from my collection

I didn't really plan on collecting old photos after my initial purchase, but today I found a few photos that I just couldn't leave behind and I had to share! Enjoy! :)

I believe this type of photograph is called a
"Cabinet Card"


Up close shot of the mat

Back of the above photo, because almost the
entire back of it is covered with the photographer's
information I believe this photo is from 1888-1900.


"Jan. 57"

Looks like the CA State Capital
Believe this photo is from the 50's as well.

Aerial Shot

Aerial Shot

Island Life

Hope you enjoyed the photos as much as I do! :)

Until next time friends...Cheers!!!

<3 Noonie


I am participating in the following link party, so stop by if you can:

Sleep No More


I've had the pleasure of experiencing "Sleep No More" the play which takes place at the McKittrick Hotel in Chelsea.

If you haven't heard of it, you should! (Especially if you live in NYC)
Essentially, Sleep No More is an interactive play in which the audience is part of the production. It takes place in a 5+ story building, and the entire building is the stage. You, the audience, are free to frolic about the building at your whim and are encouraged to be bold and do what you feel in the moment. The actors are in these same spaces and act out the play Macbeth. You may be standing in a room and in run the actors who subsequently perform their scenes. You can react, follow, or disappear... Whatever tickles your fancy.

Recently I had my second experience of SNM, and might I say the second time was more fun than the first! I saw rooms I'd not viewed the first time, and scenes I had missed before. However the best part for me was involving personal skits with the actors. In this performance actors will grab members of the audience and act out a unique skit with them in a private room, and I was lucky enough to do it twice! 
I felt so honored. 

On the way out Gallow Green handed out fresh fruit pop cycles, which were both delicious and a surprising treat!

A few tips for your evening, should you choose to embark on this journey...
- grab a drink at Gallow Green (before or after)
- wear comfortable shoes
- separate from your friends
- be bold
- be adventurous
- be curious


26 September 2013

End of Summer Potluck aka A Recipe Packed Blog!

Bean Salad
Recipe can be found below :)
This past weekend my art projects had to be set aside as I got the house ready for a little get together. My boyfriend and I had not hosted a party for friends at our place since we moved here and I wanted to have an end of Summer BBQ/Potluck and so that is what we did. I really enjoy hosting get togethers, from the planning of it, to preparing the food etc.. I thought it would be fun to host a Potluck so there would be a variety of food, all from various peoples' kitchens and thus different recipes outside of my realm.

There was a variety of delicious dishes at the get together. We had barbecued hamburgers, potato salad, hummus and all kinds of other yummy food. A couple that really stood out to me were the spinach dip and a delicious bean salad. My boyfriend's dad made the spinach dip which was served in a sourdough bread bowl it was so good and a huge hit as an appetizer. My boyfriend's dad was nice enough to give me the recipe as it follows below, I can't wait to make it for the next get together!

An advanced "shame on me" for not getting more photos of the food! 

Best Spinach Dip

Prep Time: 
15 Minutes 

Chill Time: 
6 Hours

Ingredients:
*1 Cup Mayo
*1 16oz Sour Cream
*1 1.8oz Package Dry Leek Soup Mix
*1 6oz Can Water Chestnuts, drained & chopped
*1/2 10oz Package Chopped Spinach, thawed & drained
*1 1lb Round Sourdough bread

Directions:

*Mix all ingredients together (minus the bread of course)
*Chill for 6 hours
*Remove top of sourdough bread, fill with spinach dip 
*Use removed bread for dipping 

As for the bean salad, it's not only pleasing to the eye but it also tastes great! It's a very simple and filling salad and made a great side! I didn't get the exact recipe from my friend's fiancĂ©, but have a rough idea of some of the ingredients. This salad can be made into many different variations..experiment! 

Bean Salad
(Pictured above)

Prep Time:
About 15-20 minutes
(I have yet to prepare this myself)

Bake Time:
N/A

Ingredients:

*Can Kidney Beans, drained
*Can Black Beans, drained
*Can Corn, drained
*Avocado 
*Tomato
*Cilantro
*Olive Oil
*Various herbs & spices

Directions:

*Dice the tomatoes, avocado and cilantro
* Mix all veggies and beans in a large bowl
*Add a little Olive oil and your herbs, mix and serve

I wanted to try a few new recipes myself for this special get together so I hit up my Pinterest board "Grub" and got a few ideas. I wanted to make a quick to prep appetizer and a dessert as well. I decided on mozzarella stick bites served with a marinara dipping sauce for my appetizer, and a Jello poke cake for dessert; neither of which I had made before. 

The mozzarella stick bites required very minimal prep time which made them ideal to make in the middle of our get together. I would suggest to only make as many as you will eat in one sitting, as I found out the hard way they don't reheat very well at all.

As for the Jello poke cake, I had never heard of this type of cake before until a couple of months ago when my boyfriend's grandma brought one over for a family dinner. Jello poke cakes are super easy to make and a good variation on the typical cake. They are very moist and have a lighter taste to them compared to a typical cake with frosting.

Easy Mozzarella Stick Bites

Prep Time: 
5 Minutes or less
Bake Time: 
10-12 Minutes  

Ingredients:

*6-8 String Cheese Sticks 
(Depending on how many bites you'd like to make)
*1/4 Cup Milk
*Bread Crumbs
*Spaghetti Sauce or Tomato Sauce

Directions:

*Cut the string cheese into 1''-2" size bites
*Dip cheese into milk
*Then dip cheese into bread crumbs
*Place on cookie sheet
*Bake @ 325 for about 10-12 minutes

*While bites are baking warm up some spaghetti sauce
 to use as a dipping sauce for the bites.


Jello "Poke" Cake

Prep Time: 
5 Minutes for the cake
5 Minutes for the Jello
3 Hours for the cake to chill
Bake Time:
23-28 Minutes for the cake

Ingredients:

*1 Box yellow or white cake mix
(+ whatever ingredients are necessary
to make the cake)
*1 Box Jello
(Flavor of your choice)
*Whip Cream
(Optional)

Directions:

*Bake the cake as directed on the box
*Let it cool for about 15 minutes once it's done baking
*5 minutes before the cake is done cooling, 
make your Jello mix using only boiling water, omit the cold water 
*After cake has cooled use a toothpick or fork and
poke small holes into the cake
*Once the Jello is mixed and ready pour the Jello
directly on to the cake where it will seep into the holes
*Set in refrigerator and let the cake chill for 3 hours
*Once Jello has set, your cake will be ready and can be served as is,
or can be topped with whip cream

Not only was the food delicious, but everyone had a really nice time catching up. It was great to have some of my closest friends all under one roof enjoying each others company. After we stuffed ourselves full we decided to enjoy a fire in our fire pit. It wasn't something we had planned but I do enjoy spontaneity! Enjoying a beautiful night outside by a fire was the perfect way to end the night with our friends and family, and I can't wait for the next time we get to do it again! 


Until next time friends...Cheers!!!

<3 Noonie

Roasted Veggies


In terms of cooking, these days I have similar sentiments to that of Noonie (as can be seen here), also you might have gathered as much via some of my previous posts.

The past few months I've been learning to cook at home again, and been figuring out how to do so whereas not to take up too much of my free time.
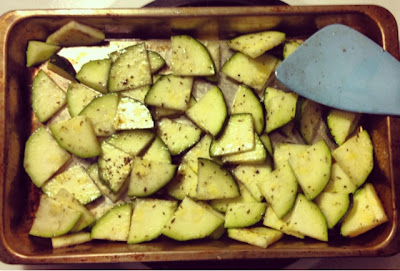
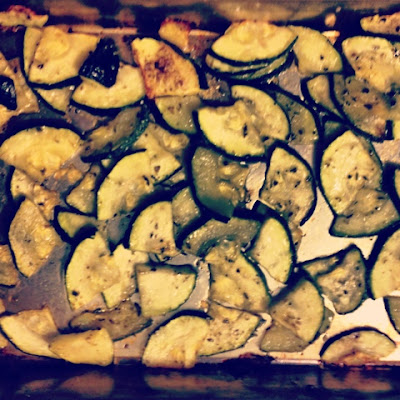
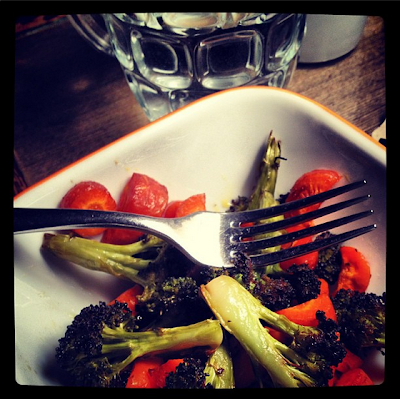
One of the best ways for me to save time and eat healthy throughout the week is to roast veggies and have a grain, rice, quinoa etc. While roasting veggies can take upwards of 1 hour, they will last in your fridge for 3-5 days, and be readily available to pack in your lunches.

What I do is cook a pot of a grain: rice, quinoa, farro, spelt, wheat berries, you name it. I cook these simply in water with a little salt, let them cool down, transfer into tupperware, and store in the fridge. At the same time I will roast some veggies; just grab something that is in season, cut them up, throw them in a pan with some olive oil, salt, and pepper and place in the oven for 30-60 minutes (depending on the veggie). The good part about cooking both of these is they are easy, you can start the process and walk away for 30-60 minutes. I often prepare these while also doing homework, and I get up and check when the timer goes off. This way it doesn't take away too much of my 'me time.'
Once finished I do the same: let them cool, transfer to tupperware, and store in the fridge.

Now, for the easy part.
Each morning as I prepare for the day, I grab a to go container (tupperware or my favorite: recycled glass jars), I grab a spoon, and I put some of the grain into it and top it off with the veggie, occasionally i'll throw a bit more olive oil on top if I feel it is necessary. This will last you most of the day, or at least through your commute. Its easy to assemble each morning (it takes 2 minutes or less) and it tastes good re-heated or eaten cold.


25 September 2013

Art in Progress aka Sneak Peaks!

In progress..
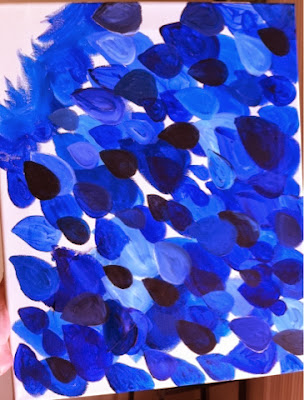
"Sea of Tears"

I've been experimenting a lot lately with mixed mediums and mediums I've never used before to create art. I'm currently working on a collage/painted piece and have recently started using water color on top of sun prints I've created and I'm really diggin' the outcome. I'm also currently working on a glass "flower" that I'm creating using glass plates which has been fun to put together.


Watercolor on a  map of NY sun print

 I've still got a bag full of other art projects just waiting to get started including a mandala piece that I'm eventually planning on painting on a friend's bedroom wall, which should be awesome. I'd never heard of a mandala before but after some research I've become quite intrigued by the whole meaning behind them, which is that of spiritual self healing by way of creating a mandala. I plan on creating a mandala painting either for myself or to sell but definitely have some ideas up my sleeve for both the wall painting and the canvas painting ;)

Sketchin' mandalas for
my next project

Experimenting with Elmer's glue to create
a "crackle" effect
I've been really enjoying this surge of inspiration that hit me out of no where and I hope it continues to flow! 

Can't wait to show you the finished projects :)
Until next time..cheers! 

24 September 2013

Savory 'n Sweet Din Din

Yum!


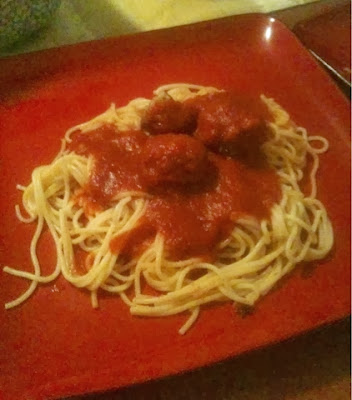
Decided to make spaghetti and meatballs for dinner tonight, and boy was it a hit. I've made meatballs one time before, but nothing compared to the ones I made tonight. Ever since I made that meatloaf with the brown sugar sauce last week I've been wanting to experiment some more with this unlikely duo. That's were the meatballs come in.

I simply googled "meatballs made with brown sugar and bread crumbs" and found a ton of recipes. Decided to go with a recipe I found on SparkRecipes.com to use as a guide line for the meatballs; although I ended up adding a few things that were not in the recipe and I didn't follow the measurements as I did not want to make 42 meatballs, which is what the recipe originally yields.

Sweet 'n Savory Meatballs

Prep Time;
5-10 Minutes
Bake Time:
15 Minutes

Ingredients:

*1 lb Ground Beef

*1/2 Cup Bread Crumbs(+/-)
(I personally like the Italian seasoned type)

*1 Egg

*3 Teaspoons Brown Sugar +
some for sprinkling

*2 Cloves Garlic 
(or you can use garlic powder 
which is what the original recipe calls for)

*1 Tablespoon Italian Seasoning

*Dash of A-1 Sauce
(I love A-1 and thought it'd add an extra kick of flavor)

*Grated Parmesan Cheese for sprinkling
(Added this to the recipe)

*Salt & Pepper 

Directions:

*Preheat oven to 425
*Combine ingredients in a large bowl
*Roll meat into balls
*Place on lightly greased cookie sheet
*Sprinkle brown sugar and Parmesan cheese on top
(I thought this would give it an extra special touch ;))
*Bake 15-20 minutes 
until sides are brown and there is no pink in the middle

Before baking
Should've taken an after! 

These meatballs turned out so delicious and very moist! Really love the sweet an savory taste! To keep the sweet 'n savory theme continuing I also served a sweet 'n savory salad. Just mixed some romaine lettuce, Parmesan cheese, Parmesan Caesar dressing, crackers, and..honey roasted sunflower seeds, which is where the sweet part comes in. 

Sweet 'n savory salad

Overall a great meal that was quick to prep and get on the dinner table! This recipe is definitely going into my recipe book, and I can't recommend it enough! Can't wait to experiment some more with the brown sugar and meat duo as it's my new favorite combo, which is something I never thought I'd enjoy.

Here's to trying new things...Cheers! :)

23 September 2013

Colonial TriBeCa


I was wondering through my beautiful city (as I often do), when I came upon this small street with older colonial style homes on it. They were so cute, for a moment I forgot I was in NYC. This block reminds me of being in Boston or Philadelphia, then I remember that this is now NYC used to look pre-capitalist take over and becoming the hub of the financial world.
We don't have many remnants left, but those we do have can be cherished.

The oddest part is when you look at the roofline of these structures, and you can see all the sky scrapers only a few blocks away.

21 September 2013

(Sneaky) Frozen Treats


As you can tell from my Brooklyn Ice Cream post, I am a big fan of ice cream & other frozen desserts.
In an attempt to be healthier, save money, and eat less dairy, I have been freezing some of my favorite fruits to use in replacement of ice cream.

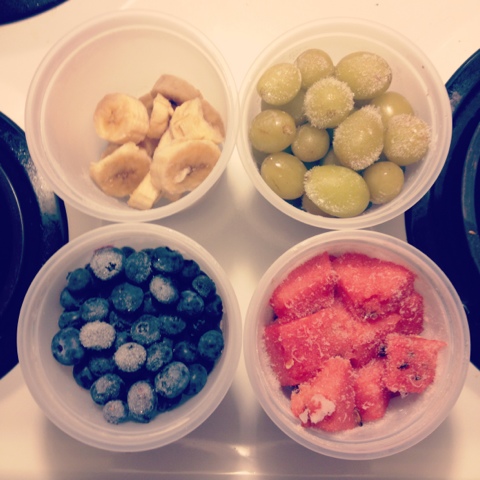
As you can see in the photo I have been freezing banana, grapes, blueberries, and watermelon.
The art of freezing fruit can be tricky, some of the fruit I've frozen does better than others. For instance, grapes are the easiest things to freeze and have a good texture when frozen. They are like eating baby popsicle and because of their skin they do not stick together. Blueberries are also pretty good because of the shape and their skin types they don't stick together too much. Banana I originally froze on a flat plate, then transferred into this container once frozen (this way they don't stick together), also the bananas are delicious with some fresh peanut butter spread on them frozen and creamy, delicious!
So far two fruit that I wouldn't recommend freezing (to eat as a frozen treat) are the watermelon and kiwi. I say this because both of them stick to one another, and the texture once frozen are harder and less enjoyable. However, if you want to freeze them to preserve them for a later date, thats a different story.
Another option for frozen watermelon is this 'frozen watermelon cake' consisting of 3 ingredients: watermelon, greek yogurt, and almonds.

Hope these frozen treat ideas are helpful.

20 September 2013

Meat & Taters Kinda Night

Dinner is served!
Operation dinners at home has been a success! A few weeks back I wrote about how my boyfriend and I wanted to get out of the habit of always going out for dinner and we've been stickin' to our guns. Not only did we cut out the routine of going for dinner but my boyfriend has been taking lunch with him to work instead of going out for lunch everyday. What I didn't mention earlier is that he is a super picky eater, so these are huge feats!

I've been making all kinds of yummy dinners and lunches for him and myself, and I found a particularly delicious meatloaf recipe on AllRecipes.com that I just had to share! What I love about AllRecipes is that it allows you to input how many servings you'd like to make and it will tailor the recipe for you. This really works for me because I typically only cook for my boyfriend and myself. I've never made meatloaf like the one I'm about to tell you about but this bad boy went right down in my recipe book.

The following recipe serves 4, as I mentioned you can tailor the serving size to your needs directly on AllRecipes.

"Easy Meatloaf"

Prep Time: 10 mins
Bake Time: 1 hr 10 mins

Ingredients: 

3/4 lb. Ground Beef
1/2 Egg
1/2 Onion, Chopped
2 Cloves Garlic, Chopped
1/2 Cup Milk
1/2 Cup Bread Crumbs, 
(I use Italian Seasoned Bread Crumbs)
1 T. Italian Seasoning
S & P, to taste

Topping:

1 Tablespoon Brown Sugar
1 Tablespoon Mustard
2 Tablespoons & 2 Teaspoons Ketchup

Directions:
*Start out by preheating your oven to 350.

*Combine top ingredients in a large bowl. 

*Place meat mix on a lightly greased loaf pan. 
(If you don't have a loaf pan simply form the mix into a loaf shape and place into a baking dish.)

*Combine the topping ingredients in a small bowl and spoon on top of the meat loaf.

*Place in oven for a little over 1 hour.


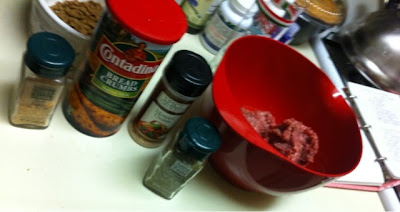
Some of the ingredients


All done!!

This meatloaf came out so moist and full of flavor! I really really loved the sauce that goes on top of it and plan on making extra next time as it is so good! The hint of brown sugar really did wonders for it!

Even my picky eater really enjoyed this meal proclaiming "this is the best dinner you've ever cooked!", and that's sayin' something!

I couldn't recommend this recipe enough! It's easy to make, the prep time isn't bad, and the left overs are great for making meatloaf sandwiches!

Happy Friday all!! Cheers!!

<3 Noonie


8/2014 UPDATE: I've been making this recipe for quite some time + have added my own ingredients to the original recipe along the way. I have updated the recipe above to reflect these changes which consist of: adding garlic + Italian Seasoning as well as using Italian Seasoned bread crumbs rather than just regular ol' bread crumbs. These little tweaks have made an already delicious recipe even better! Hope you enjoy! :)


19 September 2013

Banana Flax Corn Muffin


I adore the smell of fresh baked banana bread, well any bread really.
Today I decided to go on an adventure in baking land and try something new and different for me, flax seeds and banana.

I've tweaked my previous recipe for corn muffins a bit and have been playing with them by adding different fruit and herbs to them depending on my mood. I found out that peach was a bad idea, after 2 days the area around the peach chunks turned green! Yikes!!!! Blueberries are a good fruit to mix, as were scallions and goat cheese, peanut butter, and honey.
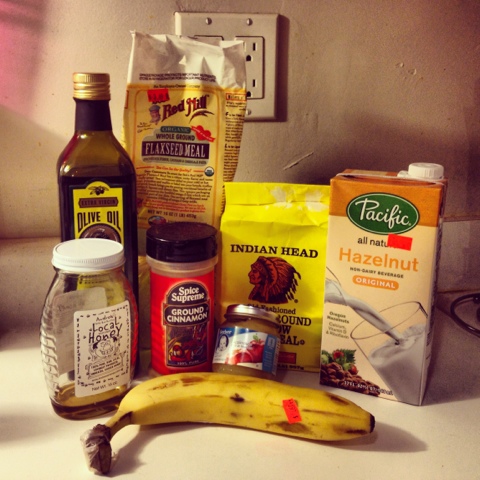
Since I've been in the mood for banana bread lately (perhaps because there is a slight chill in the air) I figured it was time I try banana muffins. I decided to also try out adding ground flaxseeds to the mix for health benefits, and I swapped from Almond to Hazelnut milk only because I've never tried it before.
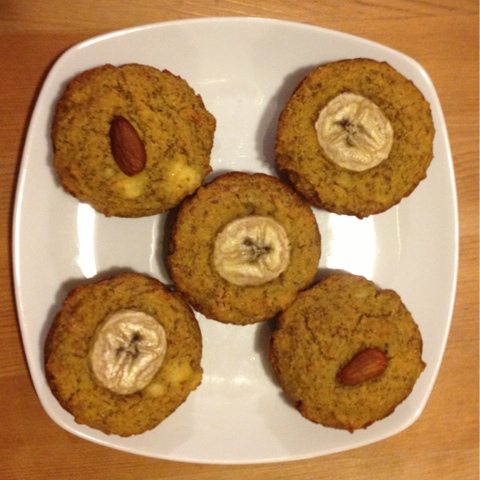
Recipe
2 cups Cornmeal
+/- 1/4 cup flaxseed meal
1 tsp baking powder
1/2 tsp baking soda
1 sprinkling of cinnamon
few pinches of salt
1/2 cup olive oil
1/2 cup hazelnut milk (or any milk you have handy)
1/2 cup apple sauce + honey (I'll explain)
2 bananas
Peanut Butter (optional)
*Makes 12-16 muffins depending on size*

Directions:
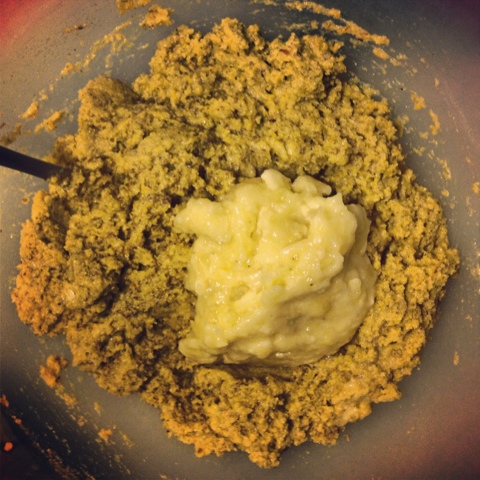
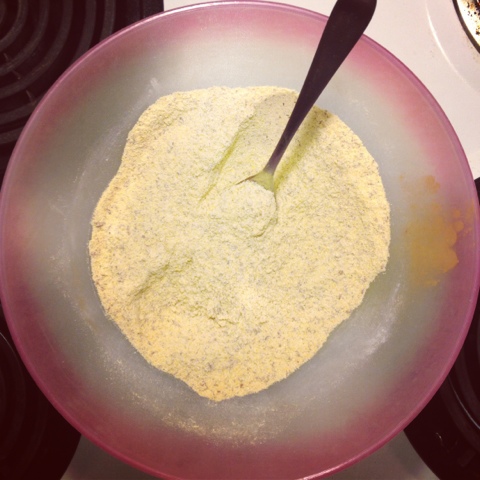
Just like last time, mix the dry ingredients in one bowl, and the wet in another. Mix each separately, then combine, stir, and add mashed bananas. Bake at 375 for 20 minutes. Done.

Now, for my apple sauce + honey combination. You could do 1/2 cup of honey, which I was doing for my first few batches, but that got expensive, so I began supplementing my honey with applesauce (which also acts as a binding agent since I have no eggs). What I have been doing is buying a babyfood jar of applesauce pouring it into a 1/2 cup and then topping it off with honey. The applesauce takes up about 3/4 of the 1/2 cup. For me this is a good combination. The reason I purchase babyfood rather than regular applesauce is two-fold. For one the ingredients are identical between the two, and secondly I would never use all of the full sized applesauce before it goes bad and I hate to waste food. This way I use it all at once, spend $0.70, and have a storage jar for later.

Another of my favorite things to do is to fill my muffins with something. For these I filled them with honey roasted peanut butter from Whole Foods. I love the whole foods peanut butter because I can grind it myself. What I do to 'fill the muffin' is I put a little bit of batter at the bottom of the muffin pan, place a scoop of peanut butter down, then cover with some more batter. When you're finished you have a nice treat right in the center.

Healthy, all natural, and delicious breakfast treat. How can you beat that?!


18 September 2013

Favorite House in Manhattan


Down in TriBeCa lives this quaint residence. The color, the materials, the location, the shape! 

I just love it!

17 September 2013

Dark Chocolate (Honey Roasted) Peanut Butter Cups

First Batch!

I was in the market to make a healthy(er) chocolate treat for myself.
I flipped through blog after blog until I found something that I found something that tickled my fancy. This particular day, it was at Sprouted Kitchen. I stumbled upon the recipe for Almond Butter Cups, and the rest was history!
True to form, I altered the recipe to my liking, and now I have made these guys 4 different times, varying the recipe with each.
Below is my favorite of those I've come up with.

I suppose I should preface with: Honey Roasted Peanut Butter from Whole Foods is one of my favorite things to eat in this world! I can fresh grind it with each purchase, it is (nearly) all natural, and pretty healthy. The reason I use dark chocolate is because it offers more health benefits than milk or white chocolate.

Dark Chocolate (Honey Roasted) Peanut Butter Cups
Chocolate to Melt (I use Ghiradelli's dark chocolate chips)
Peanut Butter (I use WF Honey Roasted PB)
Sea Salt
Coconut Milk (optional-or any milk)
Honey (optional-or any sweetener)

Things you'll need:
Muffin Tin / Muffin Cup
Muffin Pan
Patience

Directions:
I do not list amounts here because I did not use them, I would feel it out and add more or less depending how it went.
1. Melt the chocolate.
I did this on the stovetop in a small sauce pan (right now you should only make enough for 1/2 of the PB-cups), This is where I would add the coconut milk & honey if you're interested in thinning the chocolate or making it sweeter. 
Be advised: if you do add either or both of these items do so in extremely small doses as too much milk won't allow the chocolate to set properly. I would say add no more than 1 tbsp of milk and a spoonful of honey.
2. One-at-a-time spoon a scoop of the melted chocolate into your muffin-cup. While still hot pick up the cup and swirl the warm chocolate around to coat the edges. Make sure you get the chocolate about 1/2 way up the side of the cup as this will provide the walls of your PB-cup.
Do this with all of the cups.
*You can make as many or as few as you like, which is why there are no set amounts*
3. Place Muffin Pan into freezer (for those of us who are impatient) or leave out and wait for chocolate to set/harden back to its natural state. In the freezer this should take around 10 minutes. 
Once chocolate is hardened continue to next step.
4. Scoop spoonfuls of PB into each cup, slightly flatten the tops.
*You can put any filling you like in here: PB, banana, almond butter, etc.*
5. Melt more chocolate and spoon over the top.
6. Top with sea salt (I also placed a little sea salt on the bottom of the muffin-tin before I began)
7. Place in freezer once more to allow chocolate to set, which should take about 10-15 minutes.
8. Enjoy!

One of my favorite tricks is using the muffin tins because if you peal them off it has the same textured appearance as a Reese's PB Cup.
Another trick I do is keep a few in the freezer and eat them while frozen (I discovered this on accident bc I made a Frankenstein batch, turned out to be the most enjoyable) its almost like having an ice cream sandwich!


Frankenstein Frozen Batch


16 September 2013

Hamburger Cupcakes & Cake French fries?!


Left: Standard size cupcakes
Right: Extra large cupcakes

Hamburger cupcakes. That's right. Mini Hamburger cupcakes. Cute, and great for any occasion really as they are kind of a novelty you get to eat. I don't know where I initially saw this idea (knowing myself it was probably on Pinterest). I believe I found the recipe on Martha Stewart's website and just kind of went from there.

I guess I should tell you my dad owns a burger joint, and I wanted to make these awesome mini hamburger cupcakes to sell. I thought they would kind of separate our burger joint out from the rest, because to this day I have not been able to find a single hamburger cupcake any where for sale in my area. So they are not only unique but also super tasty and easy to make!

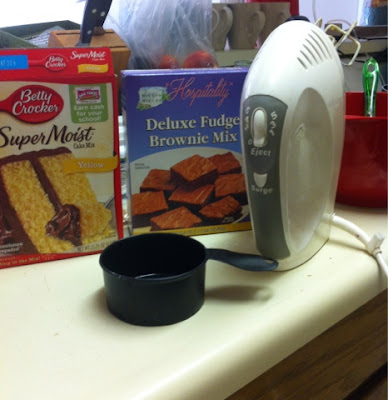
Some of my baking supplies


Basically you just start out with a 12 cup muffin tin, 2 13x9 cake pans, a box of yellow cake mix, a box of brownie mix, a can of red frosting, some vanilla frosting and food coloring. I wouldn't suggest using cake pans any smaller than a 13x9, as you want both the cake and brownies to be on the thinner side. Another thing to keep in mind is that you can cut down on your prep time if you buy frosting that is already colored so you don't have to color it yourself. I would suggest however to definitely purchase the red frosting, as it is pretty much impossible to get the vanilla frosting to turn super ketchupy red using the red food coloring (you'll just end up with pink frosting).


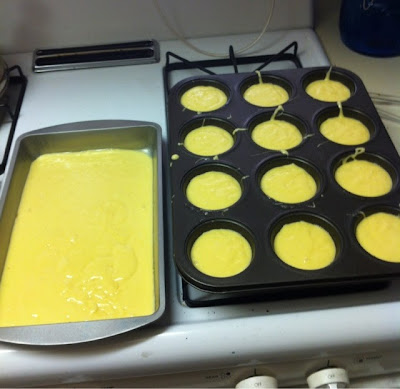
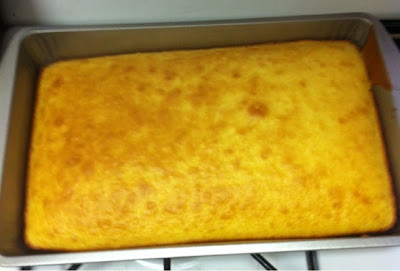
1 box of yellow cake mix yielded both of these


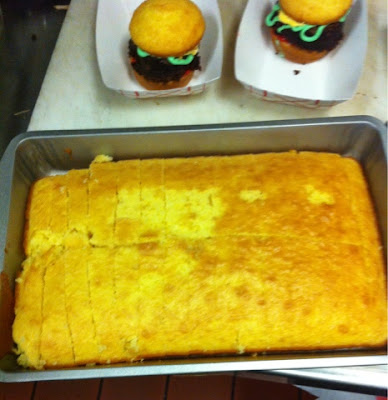
To make these little hamburger delights, start out by mixing the yellow cake mix as directed on the box. Then using a measuring cup fill your muffin tin about 3/4 full, I've found that the fuller they are the puffier your "buns" will be. You'll find that after filling your muffin tin that there will be about 1/2 of the yellow cake mix remaining, this will be used to make your French fries. Bake your cupcakes about 15 minutes, they won't take as long as the box says as you are not using all of the mix in that batch. After your cupcakes are done, simply put the remaining yellow cake mix in your cake pan and bake about 15-28 minutes, this will also cook a lot quicker because you are only using 1/2 of the mix.

Waitin' on the cupcakes


While the cupcakes/cake are baking, mix up your brownie mix according to the box and place the mix into the second cake pan. When your cake is done baking, pop your brownies in the oven about 20-25 minutes, if they get a little crunchy on bottom it's fine as the brownies are going to act as the "meat" to your mini hamburger cupcake.


Fresh out of the oven "buns" for the burgers!


The "French fries"


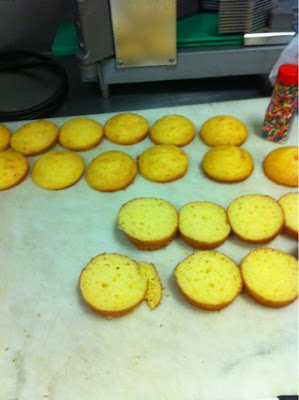
Once everything is baked and cooled down, it's time for the real fun to begin..assembling your hamburger cupcakes! To begin cut your cupcakes in 1/2 horizontally to make your top & bottom "buns". You'll then want to cut your brownies, I use little round sauce containers to cut my brownies into 12 "meat patties".


Prepping the "buns"


Cutting out the "meat"


A large working area is a must!


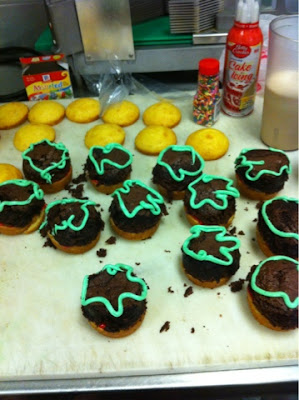
Once everything is all cut up, you'll want to mix some of your vanilla frosting and green food coloring to make the "lettuce", I always add a drop of yellow food coloring to the green to get a softer more realistic color. Next repeat the previous step using yellow food coloring to make the "cheese". As I stated above, don't waste your time trying to make red frosting with the red food coloring you'll just end up with pink. I buy the canned red frosting that comes with the assorted size tips which makes it a lot easier to apply. As for the green & yellow frosting, simply put them into a froster and apply (or you can make your own "froster" using a small zip lock bag, which is what I do).

The "Ketchup"


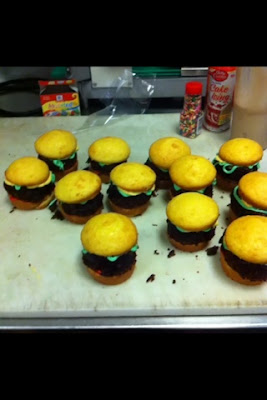
When I'm assembling my burger I start out by applying the red frosting my "ketchup" on the bottom bun, then I place the "meat" (brownie) on top of the "ketchup", next I apply my green frosting aka "lettuce" around the perimeter of the meat (so you'll be able to see it when top bun is on it), then I apply my "cheese" in a square like design along the perimeter of the "meat", and lastly I place my bun on top. I find that it works best to use a twisting motion when placing the top bun on top of the meat so the frosting comes out of the sides (it's more realistic). I also add white sprinkles on top of the buns to act as the "sesame seeds" to add more of a true burger look. To get the "seeds" to stick better I simply put a tiny tiny bit of water on the buns where I want the seeds to stay.

Buildin' the burgers!


Adding the "lettuce"

What's a burger without some cheese?

Before I added the seeds.

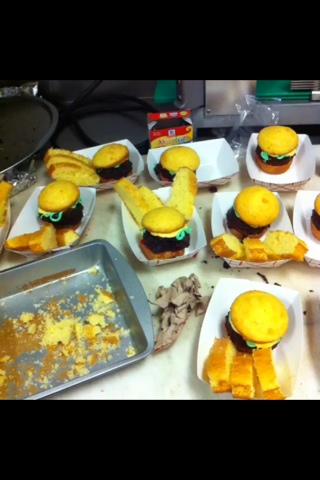
Now for the French fries, you'll just want to cut your yellow cake into fry like strips and place them with the burger. I wanted my fries to look realistic as well so I sprinkle a little sugar on top for the "salt", and just a little red frosting on the side for the "ketchup". I found other recipes where they use sugar cookies for the fries so they have that crunchy fry texture, but the  yellow cake mix works just fine too.

Cutting the fries


Presenting the burger cupcakes
(Please excuse the mess ;)) 

These hamburger cupcakes have been a huge hit at the restaurant, as I'm sure they would be at any occasion. I mean it's not everyday that you get to eat hamburger cupcakes and cake fries 


Enjoy..cheers!!