29 October 2013

Halloween Treats!


Tasting the spirit of Halloween!
This has been the first Halloween in years that I've really gotten into. That being said I decided I wanted to make some Halloween cookies for the neighbors. What initially gave me the idea to make cookies was the fact that I found a pack of 18 Halloween cookie cut outs for sale at Michael's for $1.99. Not bad. I'm sure they are even cheaper now as Halloween is almost upon us. (On another note not related to cookies, Michael's has a 40% off mobile coupon available on their website, which is always good to know..your welcome ;).) Anyways back to the mission of these Halloween cookies, I wanted to make sugar cookies but didn't have a good recipe that's were good ol' Google came in. Found a simple sugar cookie recipe and away I went, the recipe stated it would yield 24 cookies, but I ended up with 42 which worked for me.

Fresh out of the oven

Simple Sugar Cookies

Ingredients:
1 Cup Butter
1 Cup Sugar
1 Large Egg
1 Teaspoon Vanilla Extract
2 Teaspoon Baking Powder
2 3/4 Cup Flour

Directions:
Cream butter and sugar
Add egg and vanilla
Mix all dry ingredients, slowly add butter mix, stir
Roll out dough on floured board
Cut out and bake at 400 for 7-10 minutes
Cookies will be light in color with light browning along the edges


Cookies galore!

Now before we start talking about frosting let me forewarn you be sure you have plenty of time on your hands before beginning the frosting part of this venture, especially if you're planning on mixing more than just a few colors worth of frosting. It took me about 2 hours from start to finish to make and mix all of the variety of colored frosting and to frost the cookies themselves.

Typically when I make homemade frosting I just mix powdered sugar and water but wanted to see if there was a different variation on this and of course there was. Found a recipe for frosting which was pretty much as the same one I had been making except it calls for milk instead of water. I ended up liking the milk better than the water as it made the frosting thicker. The frosting recipe also called for vanilla extract which gave the frosting a nice taste, but I did not like the off white color the vanilla gave the frosting. I ended up using this off white frosting for my colored frosting, by simply adding food coloring to it. To create a nice bright white I cut out the vanilla extract, and just used powdered sugar and milk, which worked great. I really liked this frosting recipe as the frosting was thick, and it set quickly which made it easier to do my designs. As the frosting does set fairly quickly I would suggest only making a small batch at a time, and to only do one color of frosting at a time if that's the case. I would also suggest to only decorate one cookie at a time as it does set quickly. I tried to frost a few cookies at a time and had to work against time to spread the frosting before it set. Learn from my mistakes :)


Off white frosting due to vanilla extract
Bright white due to no vanilla extract

Simple Cookie Frosting

Ingredients:
1 Cup Powdered Sugar
1 1/2 Tablespoon Milk
1 Teaspoon Vanilla Extract

Directions:
Combine all ingredients until smooth.

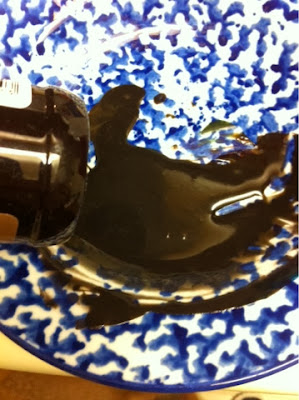
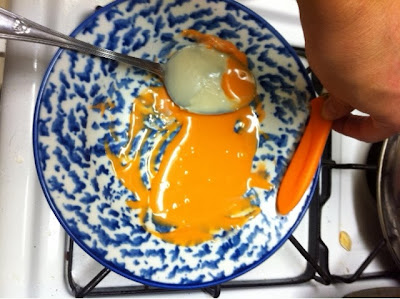
As I stated I used food coloring to create different colors for the frosting and learned a few new things about mixing colors with food coloring. Being as I was making Halloween cookies I needed a good black frosting. I hadn't thought about it until after I got home (as they do sell black food coloring at the store) so I decided to try my hand at creating some black frosting, boy was that an experience. I did some searching online to see if anyone else out there had concocted a good recipe for black frosting, and found one recipe to try which entailed of 4 drops of red & blue, and 2 drops of green and yellow. I followed the directions as is but the color initially turned out to be an army green. I found I had to add a bunch more red and blue to finally achieve a dark dark brown, which became blacker as it dried. I was happy with how my black came out but if I require a lot of black frosting in the future I will definitely just buy the black food coloring as it would save me time and irritation lol. I found a good recipe for orange turned out to be 2 parts yellow, 1 part red. The rest of the colors I created were pretty straight forward just using the primary colors of the food coloring with some frosting. 


My black frosting
The perfect Halloween orange :)

 Although it did take some time to make these holiday cookies I am super proud of my first ever Halloween cookies, and I know the neighbors were happy with them too ;)

**Enjoy and Happy Halloween! Cheers!**

27 October 2013

Tuna Salad


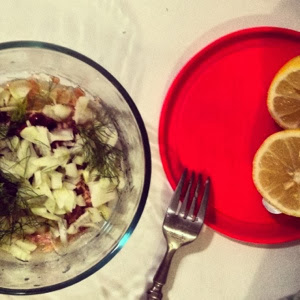
Tuna salad is one of my favorite lunch time treats. Particularly the tuna salad from 'wichcraft.
I was buying these salads daily last year, when my boss said "why don't you just make it?" And genius struck!

So my obsession continued! 
The salad is super simple and easy to make, plus I'll give you tips on packing salads in your lunch. I spent years not eating salads because I thought it'd be soggy by the time I got to where I was going, then I read about packing salads one day and my work lunches changed.

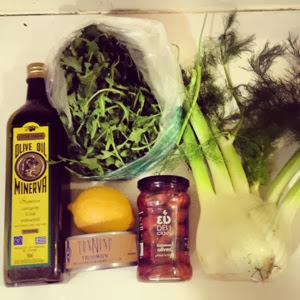
Salad Recipe:
Tuna (packed in olive oil)
Olives
Fennel
Lemon juice
Olive oil
Arugula

Packing:
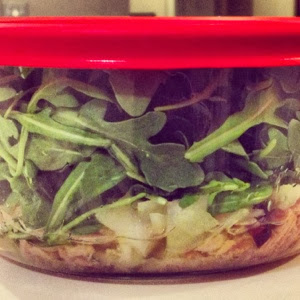
1. Put the wet parts at the bottom.
2. Start with tuna and oils, then olives and fennel, and place the arugula on the top.
3. Put the lid on and shake away.

I often make my salads the night before, and 16+ hours later when I eat it the lettuce is still crisp.


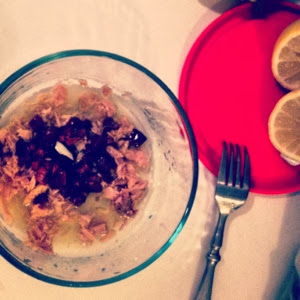
'wichcraft version


my version


24 October 2013

ME Day


For the past few months (and next few) my life has been go, go, go. No time to spend with friends, no time to cook, and no time for myself. So yesterday when my boss called to tell me I could take the day off I was perplexed. Initially I called my coworkers to see if I could pick up shifts, scrambled for work to do. Then I realized, why? I haven't had an entire day off (especially a weekday) in who knows how long. So I decided to take it, and the ME day commenced.
I figured I'd do somethings that I love but never have time for. I slept in (to the ripe time of 9:30), went to one of the local coffee shops I'd been meaning to try, take a stroll through the MOMA, and have dinner with some friends.

The coffee shop is so "hip" I almost hate it, but it's so good how can I? It's called Coffeed and is housed in the same structure that houses the worlds largest green roof: Brooklyn Grange. They have a wide variety of coffee, including cold-brewed (one of my new favorites); but on this day I went with a Cortado, a shot of espresso with steamed milk a little smaller than a cappuccino. I stayed there for about an hour people watching  enjoying every sip.

Next stop, MOMA
I often only go to MOMA when friends are in town and always on the free night, which is a zoo! So this particular Wednesday was quite a treat with a normal sized crowd. I love their mix of new and old modern art, but especially I enjoy the architecture. The building has these random windows with views of outside to watch the sunlight dance across the tops of buildings, and internal windows that allow the viewer to have a glance across the museum to other people claiming stairs or walking through the large display spaces. I saw the removal of the Le Corbusier exhibit, The Collage City, and some Georgia O'Keeffe for a change. Then sat outside in the sculpture garden for a bit before taking off for dinner. 

Dinner was lovely, met up with some friends. We had high hopes for the restaurant, but it was a bust. The wine selection was good but nothing worth writing home to, the food left much to be desired, and the service was mediocre. However the company was great, so in the end that's the most I could ask for.


21 October 2013

This is Halloween! This is Halloween!

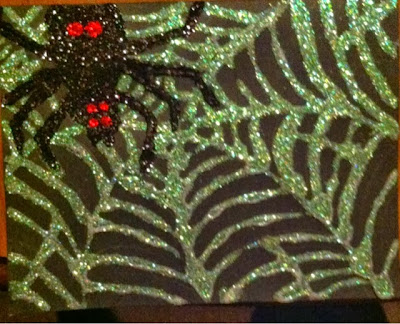
My homemade Halloween cards :)

First things first yes I've been blog slacking. I have no excuse other than feeling a bit off and uninspired, but with Halloween right the corner I decided I better get into gear! I wanted to "get into the spirit" of this upcoming holiday and thought it'd be fun to send out Halloween cards for the first time. They had a ton of cute cards at the store, but I wanted to add my own personal touch so thought I'd make mine own instead!

I wanted to keep it simple but still make a bold statement so I decided to use some good ol' fashion glue and glitter. I wanted the glitter to really "pop" so I picked up some blank black cards and envelopes from Michael's. I had already purchased a 12 pack of assorted color glitter from Walmart prior to going to Michael's which ended up being a mistake as Michael's had cheaper glitter in smaller quantities (which is more ideal for this project). But ya live and ya learn right? 

All stocked up on my supplies I headed home to get to the fun part. As I stated before I wanted to keep the design simple for my cards so decided to do silhouette style design. To start I just sketched out my design on the card, "filled" it in with the glue, sprinkled some glitter on top, then shook off the excess glitter and BAM my first homemade Halloween card was done. The process of making these Halloween cards was simple and only took a little time but I'm very happy with the outcome!

Rough sketch
Adding the glitter
Ta da!
In this day and age home made cards are becoming some what of a "dead tradition" for lack of better words. This is one reason I decided to make my own cards.  I plan on continuing this new "tradition" of mine in an effort to keep homemade cards alive! 

10/21/13 UPDATE: Whoops! I forgot to add a very important final step for the cards! To prevent the glitter from getting everywhere I sprayed fixative on my cards! But I'm sure hairspray would do the trick too! ;)


On another note, while I was at Michael's I noticed a flyer on their window advertising that they are a "drop off" location for something called "Operation Christmas Cards". "Operation Christmas Cards" was set up in order to collect Christmas cards to send out to all active military personnel. A large number of troops aren't able to spend the holidays with their families as they are out protecting our freedom, which is where Operation Christmas Cards comes in! The goal of operation Christmas Cards is to send out quality, preferably home made Christmas cards, to show our appreciation for our military personnels' sacrifices. I think this is a great cause and wanted to get you all involved! 

Check out this LINK for more information about Operation Christmas Cards!!! 

Until next time friends...Cheers!!!

<3 Noonie

07 October 2013

Glass Jars


As I have been getting older, I've been more conscious of what I put into my body. Healthy eating has become more of a permanent fixture in my life, which is a welcomed consequence of aging.

Alongside natural food consumption, and a mostly organic diet, I began learning about plastic. One of my good friends from high-school turned me onto the movie Bag It. I had been apprehensive about plastic before this movie, but watching it changed my opinion completely!
I had not considered just how much plastic I was consuming among the various daily activities,
Turning off my morning alarm (plastic phone cover)
Washing my hair (plastic shampoo bottle + plastic in shampoo)
Brushing my teeth (plastic toothbrush)
Making Breakfast (plastic tupperware + plastic dishes + cups)
Putting on Jewelry (plastic rings)
Leaving the house (putting on my plastic sunglasses)
Walking to the subway picking up a coconut water (plastic bottle)
The shop keeper put the coconut water in a plastic bag
Stopping to grab coffee (paper cup is lined with plastic)
Entering the subway (plastic card, plastic seats, plastic ads.)
You get the point....
Once I began thinking about this the possibilities were endless, bags, containers, utensils... 

A few small things I have done to change my daily life are I've begun carrying around a canvas bag with me, particularly when I know I will be heading to the store to pick up groceries, I refrain from using a bag at all when possible, I've begun choosing glass over plastic bottles when making purchases at the grocery store (for example honey and peanut butter), and I've begun storing my goods in glass jars as well.
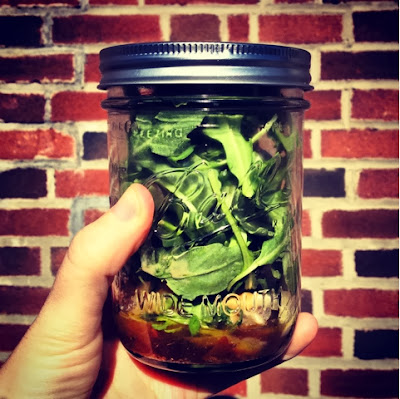
The last two points work well together. Because I've begun purchasing more products in glass jars, this allows me to wash them after and re-use them for storage or for use when packing my lunch (As the photo above illustrates). 

I would like to conclude with the fact that, yes, I do still consume plastic. There are some instances where there is no escaping it, and I use it. I'm not as intense as I may seem by this post, however, if I can help it I will.

Pictured Above - Left to Right
Glass Jar from Dollar Store - Inside: Dried Cranberries
Jelly Jar - Inside: Red Quinoa
Local Glass Honey Jar - Inside: Raw Pumpkin Seeds
Glass Kalamata Olive Jar - Inside Dried Figs
Claussen Pickle Jar - Inside: Raw Almonds + Raw Organic Cashews
Smuckers Peanut Butter Jar - Inside: Flax Seed
Gerber Baby-food Jar - Inside: Homemade Trail Mix
Gerber Turtle Baby-food Jar - Inside: Hemp Granola
Gerber Lion Baby-food Jar - Inside: Mini-Banana Flax Corn Muffin (below)

The Trail Mix & Hemp Granola are re-used baby-food / apple sauce jars, which are perfect for individual serving sizes and great for travel. You can read my brief discussion of them HERE
Plus they make some with cute animal lids!

04 October 2013

Current Projects: Dough & Wood Burning

Ta da!


I've been keeping busy with projects lately, both in and out of the kitchen. I guess I should address the later first, projects in the kitchen! I got it in my head a few days ago that I wanted to make my a home made pizza. I've made one pizza from scratch prior, but alas it was years ago. I found the recipe I used back then and decided to give it a go. I was just beginning the process of making my pizza dough, when I started to feel really crummy out of no where so my boyfriend ended up making the dough for me. I wanted a deep dish pizza so I thought to try to use a 9" cake pan, which was not a success. Maybe if I had used less dough it would've been okay, but I used too much dough which led to an extra thick crust which led to an under cooked crust. Operation pizza was a bust. Needless to say when had brownies for dinner that night (shame shame I know).

But I don't give up that easily, and knew I had to try again. So that brings us to today. I set about making my pizza dough, mixing and kneading it myself this time. I don't have much experience making any type of home made dough so I hit up YouTube to attempt to pick up some kind of technique for kneading and stretching the dough. This lady was pretty helpful.This time I used a pizza pan and after kneading the dough for about 5 minutes, I stretched it and formed it to the pan. Topped it with my sauce and ingredients and popped it in the oven. My recipe stated it would take about 20-25 minutes. I left the pizza in for about 30 minutes and the crust still wasn't finished cooking. One thing I did learn is that you'll know your pizza is ready once the bottom of the pizza gets golden brown as opposed to white. Another thing I learned from this pizza experience is that mushrooms will shrink a ton on you once they are cooked! I was happy overall with my pizza creation, but I believe there's always room for tweaking and perfecting, so I'm going to keep on at it!

The recipe I used is below, although I tweaked it and added a couple of my own ingredients. I don't recall where I got the recipe originally as I wrote it in my recipe book a long time ago.

Noonie's Pizza

Prep Time: 15 minutes or so
Bake Time: 45 minutes or so

Ingredients:

*Toppings of your choice

                                                Pizza Dough:                                  Pizza Sauce:

                                               *1 T dry yeast                               *1 1/2 Cup tomato sauce
                                               *2 T vegetable oil                          *1/4 t pepper
                                               *1 1/4 Cup warm water                 *1/4 t sugar
                                               *3 1/2 Cup Flour                           *1/2 t chopped onion
                                               *1 t sugar                                       *1/2 t basil     
                                               *1 t salt                                          *1 t oregano
                                                                                                     *1 T garlic
                                                                                                     (I used fresh sauteed garlic)
                                                                                                     *1 t chili powder
                                                                                                     *1 t red pepper flakes


Directions:

Dough:
*Dissolve yeast in warm water
*Stir remaining ingredients along with 1/2 of the flour, beat for 5 minutes
*Add remaining flour, stir
*Knead dough on a floured board for 5-10 minutes, transfer to
a lightly greased pizza pan
(After I kneaded my dough I got it partially formed on the board,
then transferred it to the pan)

Sauce:
*Mix all ingredients together
*Top your pizza dough with sauce
and toppings


Mixin' the ingredients

Gettin' the dough kneaded and formed


Adding my toppings


As far as my adventures out of the kitchen I've been staying busy trying new mediums with my art projects! I've always thought wood burnt pieces looked so cool, and I've been wanting to experiment with a wood burning kit for quite a while now. Fortune struck when I found an older wood burning kit in some unpacked boxes from my boyfriend's great grandma's house! It's in great shape and thought it'd be the perfect starting out pen. Took a little trip to my local wood supply store and bought a couple pieces of Birch wood to use for my project. I've been on a mandala kick lately and decided to design one for my first wood burning venture. I got a little carried away with my design and probably should've made it simpler considering it was my first wood burning piece but I'm really diggin' how it's coming out so far! I wanted to experiment using other objects to burn pieces on, so I checked out a couple thrift stores and found a perfect wooden box to use as a wood burning "canvas".


Thrift store find..next wood burning piece


It's a process! Still have a lot
more work to do!


Really excited about my current projects and can't wait to show you the finished products!

Until next time..cheers! 

Hippie Bars!


I swear, the older I get the more I feel like a hippie. 
Lately all I want to do is move to San Francisco (well Sausalito/Mill Valley), sit in a coffee shop all day with my lap top blogging while eating my organic veggies and raw, vegan, gluten free health bars. I guess a girl can dream can't she?!

My cousin recently turned me on to Gomacro Macrobars and I fell in LOVE!
They are a great texture, they're made of all natural products, they're a bit on the pricey side at $2.50 at Whole Foods, but I think they're worth it. Additionally for the next few days I'm going vegan & gluten free, and these bars fit the bill!

Some additional bars I am trying out are pictured below.
Fiber Love bars: I came across these on a recent trip to Whole Foods, one of the vendors were giving them out so I grabbed one, it was delicious and cheaper than most of the other bars.
ThinkThin: These are good, but I don't think they're anything to whoot and ha over. I think part of what turns me off is the name, also the price is the same as some of the larger more filling bar options. But they are good none the less.
Larabar: One of the original all natural bars. These are delicious! Although, some of the flavors are a bit messy to eat as they stick to the wrappers. But who cares as long as we're happy, right?

01 October 2013

Fig + Carob Oat Muffins


After about 2 months of varying versions of corn muffins, I decided it was time for a change.
I was browsing the blog My New Roots, when I came upon her Carob & Fig Muffin Recipe. While hers look much prettier than mine, I'm sure they taste just as good.

For me the most difficult (but rewarding) part was finding fresh figs!
These were so much more difficult to find than I thought they would be. I went to 4-5 different grocery stores before I found some. 
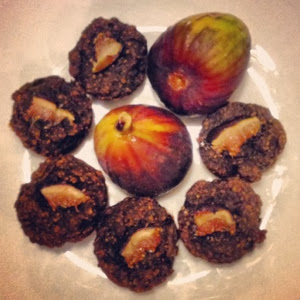
If you've never eaten a fresh fig (as I hadn't) you are missing out! They're like natures candy, they are so good, and sweet, and beautiful!

Anyhow, back to the recipe... Typically I modify bloggers recipes quite a bit, however these were already gluten free, so i only modified them to be vegan and slightly altered the sugar but only because of price and what I had available. The recipe was super simple + easy.


Ingredients:
5-7 figs
2 cups rolled oats (to be ground)
1/4 cup carob powder
1/2 cup honey (or anything similar)
1/2 cup coconut milk (or anything similar)
1/2 cup applesauce
1 tsp. vanilla extract
1 tsp. baking soda
1 tsp. baking powder
1/2 tsp. salt
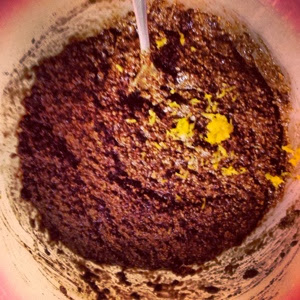
zest of one lemon
2 tbsp. chia seeds + 6 tbsp. water

Directions:
1. Combine chia seeds + water, stir, set aside
2. Blend oats in food processor until a rough flower is created.
3. Mix all dry ingredients (Including step 2)
4. In a separate bowl combine all wet ingredients + chia seed gel should be ready by now
5. Combine.
6. Chop figs, gradually add to mixture.
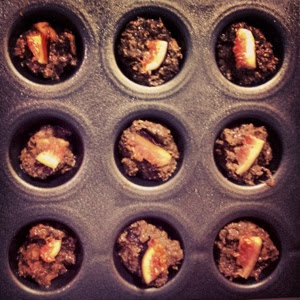
7. Spoon into greased muffin tins
8. Bake at 350 degrees for 20-30 minutes

Yield: I made mini-muffins and this recipe made about 40 of them
I would gather if you used full size muffin tins you would have about 12-15.

Tips:
These are not the most beautiful little muffins, so adding a slice of fig to the top adds another dimension of beauty. I feel that if something as small as leaving a tiny piece of fig on top helps why not do it?! :)

Enjoy!!