28 February 2014

Slow Cookin' | Corn & Potato Chowder


Dinner is served!
As I mentioned a few blogs back, I've been trying to mix it up in the kitchen by making new dishes I've eaten a thousand times before but had never made myself. This was the case with the corn dogs, as it was the case with this next recipe I'd like to share with you...Potato + Corn Chowder! Although it (had) been unseasonably warm in California lately, it is still winter time which means it is still hot soup season (although I really do love a good bowl of soup anytime of the year). I had never made this recipe before or any soups prior to this one particular night but you bet I did have success making my first homemade soup!

I think I told you all before but my boyfriend's grandma had gotten him and I a slow cooker for Christmas which I'm soo in love with!! Makes my life so much easier, and the meals we've been making in it are delicious!! Of course this is the route I wanted to go to make my soup and so it was a slow cooker recipe that I found. Mind you I found this recipe a couple of weeks ago, and have been wanting to make this soup since. When I wrote this recipe down those few weeks back I spaced out and totally forgot to write down where I had found this bad boy, so I'm not sure which site to credit, my apologies. Okay let's get down to business...

I've been putting this bad boy to work!
This recipe is meant for a 7 quart slow cooker, so you may have to adjust it a bit depending on the size of your slow cooker. I have a 6 quart slow cooker so I adjusted the recipe by basically eyein' all of my ingredients as I added them to the slow cooker, keeping the quantities of this recipe in mind. As I did eyeball everything I can't tell you exactly how much of each ingredient I put in, so I'm just going to give you the recipe as I originally found it.
Corn + Potato Chowder: Slow Cooker Edition

Prep Time:  
30-40 mins would be my guess.
 This is somewhat of a labor intensive recipe as
all soup recipes usually are.

Cook Time:  
Low for 10 hours or High for 6 hours

Whatcha Need

- 8 oz. Bacon, cooked + crumbled 
 I typically buy real high quality bacon, but as I was just going to crumble it into this soup
I didn't think it was necessary to buy the highest quality bacon. Don't get me wrong I still got good bacon but I just wasn't as particular as I usually am. On another note if it was up to me I wouldn't even have the bacon involved as I love just veggies, but I compromised, and it was delicious!

 - 2 1/2 lb. Russet Potatoes (about 5 medium sized potatoes), diced not peeled
 I used white potatoes instead of the russet potatoes because I prefer the taste.

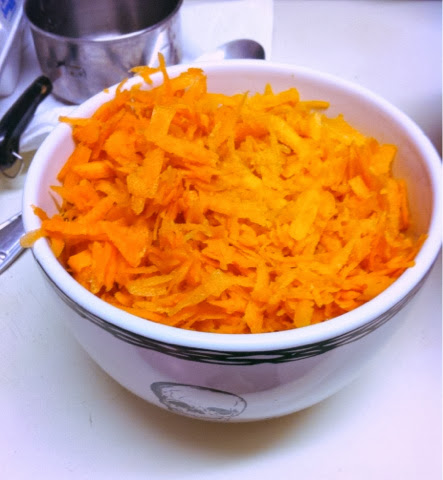
- 8 C. (2 lbs) Kernel corn
I used a bag of white sweet frozen corn instead of the typical yellow corn. This did make my soup a tad on the sweeter side, but that's just my personal preference. I suggest you use yellow corn if you're going for more of a traditional chowder.

- 1 Sweet yellow onion (medium), finely chopped
I suggest cutting this last to spare your eyes! 

- 1 C. Celery, finely chopped
- 6 Garlic cloves, finely chopped
- 4 C. Chicken stock
- 2 C. 1/2 & 1/2 or Heavy cream
- Salt + Peppa, lots!


Method

-Get yo ingredients ready! This step is going to take a minute. 

-I cooked my bacon first so it would have time to cool before I crumbled it.


-Next it's time for the fun part, the washin', the cuttin', the pealin' (if  you + carrots as I did)  you get my drift.

-Add all your ingredients, except the cream, to your slow cooker. Cook at either temperature/time listed above.


By the end of your cook time your soup will look like this, with most of the broth soaked up.
-The last 15 minutes of your cook time is when you're going to (possibly) puree your soup in a blender. Let me tell ya about this step. I started to puree a little bit of my soup, about a 1/2 cup, in the blender to see if I liked the texture/consistency, turns out I did not like either at all. I did add the little bit of soup I had pureed to the rest of the soup which turned out great! I would definitely puree 1/2 cup or so of the soup and add it again as I liked how the chowder was soupy but it didn't all look like baby food or something and still had some bigger pieces of veggies in it which I really liked. 


-Once you've either pureed some or all of your soup from the crock pot you're going to want to put the soup back in the crock pot and add the 1/2 & 1/2 or heavy cream. 


-Continue cooking uncovered about 15 minutes.


-Serve up and enjoy!!

I served corn bread alongside the soup which was super good, but I know not everyone out there is a corn fanatic so a good sour dough baguette would be fine too. There was a lot of leftovers as this soup recipe will give you a rather large batch. I know leftovers tend to get boring when you're on about day 4 which is why I suggest topping this soup with sour cream or cheese, maybe even some bacon, just to mix it up a little. 


 Healthy Modification: As promised I will try to add any modifications I can think of in order to make any recipe I post somewhat "healthier." Being that this is mostly a veggie filled soup it's already on the healthier side. One modification that may sway it a little farther towards that direction is to maybe use low fat/fat free half & half/heavy cream or you could cut the bacon out.
 
My Verdict: Soup turned out delicious! I really liked this recipe and will be making it again, but next time I'm recruiting help with the prep part of this venture! There was just a ton of veggies to cut up! But it was definitely all worth it in the end! :)

Until next time friends...Cheers!! 


P.S. We are looking for some foodies out there who have some recipes they'd like to share for future food features!! See our Contact page for more info!! :)

27 February 2014

Blank Canvas | How to Overcome Artist's Block

The ever elusive "blank canvas syndrome"

It happens to all artists from time to time...artist block that is. Definitely not an artist's friend. Artist block for those of you who have never heard of it, is when an individual can not think of anything to create although they yearn to, their "internal canvas" is blank, and there is no inspiration to be found. I have definitely experienced my fair share of artist block. It's easy for it to happen when you're busy with other things in life such as work, school, etc. to lose that artistic fire from within which leads to artist block. I have been fortunate to not feel artistically blank over the past months, but I wanted to share a few ideas for how to overcome artist block if you happen to find yourself suffering from it. I have read numerous books about artist block so some of the following tips are ones I have picked over time from these books that have seemed to help, others are tips that I have come up with over the past few years.

Noonie's Tips to Fight Artist Block

My inspiration board hanging in the studio

* Create an "inspiration board"! 
 I found this to be one of the most helpful aids to overcome artist block. An inspiration board is simply a board/place where you can post pictures of things that inspire the artist in you. Whether it's a photo you'd like to recreate, or a picture of something that inspires you, maybe some pictures of your favorite art pieces... anything that will ignite an idea or inspiration will do! The exercise of adding inspirational pieces/items has always helped me when I felt like I couldn't think of anything to create as I'm sure it will help you :)


I'm on my 2nd sketchbook now!

* Sketchbook, sketchbook, sketchbook!
I originally started my sketchbook as a way to keep track of all of my artwork, it was to act as a portfolio of sorts. Initially I just kept photos of my work in the sketchbook. When I enrolled in my first painting class one of the requirements was that we kept a sketchbook, I was already ahead of the game in that sense. I learned a lot in that class including how to improve/further my sketchbook by adding pictures of other artists' work that inspired me/I liked/didn't like and by writing my thoughts about about these pieces and my own work which was something I hadn't ever really done before. I learned a lot about myself and the type of art I like/don't like, and why I like/don't like certain pieces as we were required to take our artistic thinking/journey to the next level by taking the time to really think about all of these different elements. As I mentioned this was the time I began to think more about the "behind the scenes" of not only other artists' work but my own work as well. 

I began to record my inspirations for pieces, what I liked about certain pieces I had created, or what I would've done differently. I started to record the actual process of creating some of my pieces by way of photos. I remember the day our teacher told us that sometimes we create pieces and we don't know when to stop/to keep going take it to the next level when working and that sometimes when you get to a place where you really like the piece you're working on you should snap a photo. Recording the piece at a time you like it is a good way to force yourself to keep pushing it because even if you push the piece to a place where you're not so happy with it you still have that photo of when you were and vice versa if that makes sense. The point I'm trying to make with this tip is that if you are feeling artistically blank at some point, it can be helpful if you have a sketchbook with records of your thoughts/inspirations from past pieces because it will likely lead you be be inspired which will then help move you past the artist block.


Source

* Look at other artists' work!
Take a trip to your local art gallery, or simply do a Google search and find some art that gets you going!! (For lack of a better word) Simply looking at other artists' work always gives me inspiration when I'm feelin kinda artistically bleh. I might see an element in a piece that I'd like to recreate myself or see a piece that's done in a different style than I usually do that will inspire me to try it out.  Which brings me to my next tip...


Oil Pastel "Happiness" by Noonie

* Try something new!!
There is always something out there every artist hasn't done! Do you usually paint realistic pieces? Try an abstract piece! And vice versa! Typically work with acrylic paint? Try charcoal! There are so many different mediums and styles out there, why not get out of your comfort zone artistically and try something new! It will be sure to break any artistic block you may be feeling!


* "Morning Pages"
Okay so like I mentioned I've read a few books about artist block and how to get past it. One book that I highly recommend every artist to read (whether you're suffering from artist block or not) is called "The Artist's Way" by Julia Cameron. It's a pretty damn amazing book which kind of looks at creativity through somewhat of a "religious way" if that makes sense. Very interesting read. I really enjoyed this book as it forces you to interact with it and yourself. It's like an artist block boot camp that is broken down by weekly activities. One tool the author talks about is something called "morning pages" which is an exercise that is obviously done first thing in the morning. What you do is simply write down your thoughts at the time, a full three pages, even if you're not really thinking about anything you would just write that. Cameron believes this exercise frees up your subconscious from all those baloney thoughts which she believes is one reason for being artistically blocked. I'm not going to go too much further into this point, but it's definitely a good read for those artists out there who are suffering from what I call "blank canvas syndrome". I know it definitely helped me and kept my interest right up until the very last page.


* Creative Assignments
Another very good book I found that helped get me out of my artistic funk is called "Drawing from Within" by Nick Meglin. I really liked this book because like the book I mentioned above it gives you assignments. When you are suffering from artist block you don't know what to create, you lack inspiration but sometimes just getting your pencil down on paper can get those artistic juices flowing again. This book offers different assignments which call for you to draw specific things, in sometimes a specific manner etc. Doing these assignments get you out of your comfort zone artistically which can help reignite your creativity and get you out of your slump.


Hope these help you as much as they've helped me! Be sure to check out our 'Artist Features' (located under Blogorations) for other great tips from fellow artists on how they overcome artist block!
Once you've gotten over your artist block and have created some pieces you may want to sell or showcase them. Check out this post for my tips on how to promote your artwork! :)

Until next time friends...Cheers!!!


P.S. I wanna know...What do you do to overcome artist block?? 
Please comment below!!  

Would you like to be a featured artist right here on BSOM?! Email us! We'd love to hear from you! 
Check out our Contact page for more info! :)

26 February 2014

Zucchini Risotto


Today was a big snowday here in NYC so yesterday before I went home I stopped by the grocery store and picked up a few ingredients so I could prep food all day. First off, I was shocked at how cheap the veggies were! I usually buy my produce at a different store, but the weather has been so cold that I haven't wanted to venture out as that store is about a 10 minute walk from my house. As you can see from my receipt I spent $1.80 for veggies in this meal + 3 additional salads (One which is the Kale + Avocado Salad). The other ingredients I used in this recipe I already had in my house as I use them quite frequently.

When I set out on this dish I was looking for something healthy and easy for me to prepare, so I made a dish where I only needed to dirty one pot (because I'm lazy and don't want to wash them). The directions below will make 1 large meal or 2 medium sized meals. I set out to only make enough for one meal, but it quickly grew larger than I had planned, however everything is healthy and natural so I ate the lot.


Ingredients:
1/4 cup dried rice

1/2 zucchini
1 small parsnip
5 kale leaves
3 scallions
salt
cumin
oregano
tahini
olive oil
*all spices were to taste*

Directions:
1. Cook rice
- the rice I used (Lundberg Heirloom Brown Long Grain Rice), according to the instructions it needed to cook for 45 minutes, so I split that up into 3 different increments.
- use a medium - large pot as you will have many veggies inside before the end.
- round 1: I cooked rice in water with a touch of olive oil + salt for 20 minutes
2. Add Veggies
- I cubed the zucchini + parsnip, and threw in the white part of the scallions, salt, cumin, oregano, 1/8 cup of water, and another splash of olive oil
- round 2: I cooked this for 10 minutes
3. Add Kale
- I stirred the rice + veggie mixture
- Added 1/8 cup of water, the green part of the scallions, a small spoon full of tahini, and a little more cumin + salt; and stir.
- Place kale on top of the rice mixture (DO NOT STIR), this will steam the kale.
- round 3: cook for 15 mintues
4. Stir
- When you take the lid off the pot you'll notice the kale has wilted down, stir together everything and taste.
- Mine was not ready so I cooked it another 10 minutes, but if your rice is fully cooked then remove from heat and serve.

Tips:
I realized that the zucchini and parsnips became very malleable and made the rice mixture creamy like a risotto, which I think you can somewhat gather in the photos.
There was no butter, cream, or cheese in this but it was so creamy and flavorful that you would never know.


25 February 2014

PSSSTTT

On another note related to Sarah's blog Frugal by Choice, Cheap by Necessity....every Monday she hosts "Homemade Mondays" where you can post links to your favorite blog recipes, DIY, projects etc. and I entered in for the first time yesterday! Wanted to share this fun blog 'hosting party' as there are a ton of great ideas!! Check it!! :)

Our entries! :)


Forgive Me Father for I Have Sinned | Part II

This is my second "confessions" blog, the first one can be found here. But first things first, I wanted to give credit where credit is due. I'm an avid reader of the blog Frugal by Choice, Cheap by Necessity, hence the reason it's on our Blog Love page. The writer Sarah, is hilarious and I really enjoy her "Confession" blogs in which she "unloads silly things she's been thinking about". I like the idea so much I decided to start doing my own "Confessions Blog"!  So here goes nothin'...


* I confess...I'm a sucker for the movie Forrest Gump! I watch it at least a few times a month, and it drives my boyfriend nuts! I'm the kind of person who can watch a movie a million times and still not be sick of it, but my boyfriend is the complete opposite. Needless to say I usually get my Forrest fix in while he's at work. lol. I've always really liked the movie because I love history and I like how the movie kind of takes you through different time periods and highlights major events that have happened in the past. I'm not goin' lie I also really like Forrest and Jennys' southern accents, they just really crack me up every time!!

* I confess...I often wish I lived in a different time when life moved just a little bit slower, and things were simpler. If I could choose any eras to live in I'd choose 1945-1970s or so. I really like everything from those time periods from the cars they drove, to the clothes they wore. Of course there wasn't the technology we have today back then, and I do love modern technology! Without it, I wouldn't be sitting here writing to all you fine folks out there on the World Wide Web but sometimes I feel like technology has in way complicated things and has changed social behavior and norms and not always in such a positive way. Kids aren't out playing like they used to enjoying the simplicities of life, smelling the roses, they are often glued to their cell phones, iPads, and other various game consoles thereby limiting their connection to what's right in front of them. For me it's disturbing when I go out to a restaurant and I see an entire family glued to their screens instead of talking to one another, soaking up what's going on around them. We all have that one friend that's constantly on their phone when you're supposed to be "hanging out", don't be that person! I will admit at times I am guilty of being glued to my cell phone when I really shouldn't be, but I really do try to keep myself in line most of the time and rarely get on my phone when I'm in the company of friends (although you will occasionally catch me making a Vine of our shenanigans.) Don't get my wrong I'm definitely a fan of instant gratification which technology does supply, but at what cost?

* I confess...My dogs drive me NUTS sometimes!! They reallllly do. I have honestly considered shock therapy (a shock collar) and might have to go through with it soon. I in no way would ever condone animal abuse, but I can assume because shock collars are sold everywhere they must be relatively safe. A friend of mine ended up getting one for his dog and he said he only needed to use it one time for his dog to learn. My dogs are really smart, being terriers but that also makes them super stubborn and they just don't want to listen to me when I try to yell at them for their constant barking. Little Lucy really is the worst offender, I guess she gets the yappiness from her Chihuahua side. If they only barked when someone came to the door or something that would be fine, but they seriously bark at every little sound there hear, I can't imagine how the neighbors must feel. I mean I can't keep them inside all of the time, and one of the reasons we moved to our place is that it does have a nice big backyard for them to roam about. I can hear them going off at the moment in fact. Although they are a handful at times and I could do without the constant barking, I love my fur babies nonetheless and I couldn't imagine life without them!

Until next time friends...Cheers!!

24 February 2014

Ehh...Whats Up Doc?


Join me for a slice?

Carrot cake. Homemade carrot cake. That's what's up. Made my first carrot cake the other day, and it turned out juusttt riigghtt. So of course I had to share...
 
As I mentioned  I never had made a carrot cake prior to the other day, but I had almost an entire of bag of baby carrots that needed to be eaten asap before they were going to have to be tossed and so the idea of a carrot cake was born. I initially planned on making the cake in my slow cooker, but I realized after I had all my ingredients together that I didn't have a loaf pan small enough to fit into my slow cooker and so the oven it was.

I found the recipe for this cake on AllRecipes.com, and because it was my first time making it I didn't realize I would end up with as much batter as I did. So it was time to improvise once more and make a two layered cake. But I guess I should back up a little, I am getting ahead of myself. Let's talk about how I put the batter together.


Heavenly Carrot Cake
Prep Time: 30 mins or so
Bake Time: 40-50 mins

Whatcha Need
-4 Eggs
-1 1/4 cups Veggie oil
-2 cups White Sugar
-2 teaspoons vanilla extract
-2 cups Flour
-2 teaspoons Baking Powder
-2 teaspoons Baking Soda
-1/2 teaspoon Salt
-2 teaspoons ground cinnamon
-3 cups Grated carrots
-1 cup Chopped nuts
(optional)
-Raisins
(optional)

Method
-Preheat oven to 350
-Grease your 9x13 pans
-Beat eggs, oil, sugar, and vanilla
-Mix in flour,baking powder, baking soda, salt and cinnamon
-Stir in carrots + fold in nuts/raisins, pour mix into pans
-Bake for 40-50 mins
-Leave cake in pan to cool for about 10 mins  then remove to cool completely
-Frost that bad boy up with some cream cheese frosting, toss a few nuts on top for a garnish and ENJOY!

My grater was hungry for finger that day.
My least favorite part about making this cake? The grating of the carrots. Just when ya think you've grated enough...you've gotta grate some more! It's the most time consuming step of the process other than the baking part of course. I suggest using large carrots rather than baby carrots so you don't have to deal with getting down to the little numbs as often which = lesser chance of grating your finger! Take my advice. As I mentioned I happened to have the baby carrots which is the only reason why I used them.  
Only took 1/2 of a day to grate this bowl.
(yes that's a joke)
My ingredients station.
Adding my dry ingredients to the mix.
Now we're getting some where!
Sprinkled some nuts on top for good measure :)
Getting frosted!
In all its glory.

Double layered goodness!
Healthy Modification: As promised I will try to add any modifications I can think of in order to make any recipe I post somewhat "healthier." To be honest there was really only one modification I could think of that could possibly make this recipe healthier and that would be to add little to no sugar and maybe substitute something else for the eggs such as apple sauce. I mean come on this is cake.

My Verdict: Although I hadn't initially planned on a double layered cake I couldn't be happier with how it turned out! Super tasty recipe the only thing I would do differently next time is to add more nuts! Definitely will be making another one of these bad boys soon as this one is already almost gone!! 

Until next time friends...Cheers!!

P.S. We are looking for some foodies out there who have some recipes they'd like to share for a future food feature!! See our Contact page for more info!

23 February 2014

Artist State of Mind | A Letter from Carrie Ellen

So excited to be featuring another fellow blogger, a Miss Carrie Ellen right here on BSOM. I've been following her blog, Carrie Ellen Art Studio, since I was first introduced to blogging by Nelli last year, in fact her blog was the first one I followed :) Carrie's work and blog has been a huge inspiration to me! I really love how she is always dabbling with different mediums and her style of work is amazing! Of course I was stoked when she agreed to this feature! So without further ado here's her story... 

Meet Carrie Ellen

As I sit down in the middle of my room, laptop in hand ready to answer any questions you may have, I look around my room.  Sketchbooks and paper are scattered around  like big pieces of confetti, boxes of  colored pencils, pins, and carving tools are waiting for their chance to be used to make a master piece, big sheets of wood are leaning against the walls and doors. The only books in my room that aren't art or poetry books are not to be found, they seem to be hidden, and havent seen the light of day in some time. With fabrics, yarns, inks, paints, brushes...my room is a wave of possibilities. Some may think that I would drowned in a overwhelming messy room, but I am surrounded by what makes me want to get up each morning. 


My passion for the arts started when I was very young. Let me tell you now.I was never the black sheep of the family. My family (full of artists) knew the importance of all the arts. Growing up my parents would drag us kids to art galleries, museums, performances - anything that was local and free. I grew to appreciate and love all the arts. As I got a little older my mama went back to school to get her Bachelor of Fine Arts degree. Once in awhile she would let me go with to her art classes. One of the classes happened to be an Art History class. Though I was only 10 years old, I was fascinated! I knew at age 10 I wanted to be an artist.


When I found out during my high school years that I could take art classes in school, I had to enroll in as many art classes as I could in a semester. I was fortunate that my school had a good art program. My school offered classes from painting to drawing, photography to sculpture, jewelry to stagecraft. I wanted to know it all. Soon enough I found my self at the same college that my mother went to and taking the same classes. 


Now, after years of exploring different mediums, my style has changed over the years. I have explored painting womens faces, playful animals, landscapes, and still lifes. I was fascinated with creating happenings, postcard art,  painting saints and then circling back around to working with women. Its important to let one's work flow and evolve into something new. This is how we learn as artists. An artist doesn't need to  feel like she/he has to stick with one style or medium.  We as artist will have bad days, weeks and even years! But to that, here is what I say: Keep making art! If its bad art, push it and see how bad you can make it look. Sometimes something will come out of it. Dont worry about what others may think of your art. Create your piece and move on to the next project. Keep going forward and make a lot of art. Good or bad it doesnt matter just keep moving forward. Try not to get hung up on one painting or idea. Push it to the side and go on to something else. Dont let artist block get you down! We all have it. If you're stuck, pick up a new medium, learn a new type of art. The way to get though it is TO MOVE FORWARD and go through it!


One thing that Im grateful for was exploring different mediums. Thats how printmaking came in to my life. I do a lot with watercolor and ink, I have used it off and on through out my life but, I have worked with woodcut only for a short time. Dont let the fear of being bad at something scare you into not trying it. Who knows what will come out of it. You may find out that you love it more then the medium that you have been working with all your life. Working with new things makes me feel like that Im rediscovering art again.  One day I want to learn how to blow glass, write poetry, work with music, try welding again, maybe even work with wood and build furniture. 


What inspires me and what influences me comes from every day things, from how Im feeling that day, to where my family came from. For example my family is Scandinavian, my dad lived in Copenhagen, Denmark for part of his life. I love pulling Scandinavian styles into my wood cuts - it's a way for me to explorer and discover where I came from. I also come from a Christian background, the imagery of saints has always fascinated and influenced my art. I love incorporating the idea of modern every day saints into my art. My art is a way to find myself and who I am and who Im becoming. Its my way of communicating with others and finding out where I am going in life. 


Art is a crucial part of life from exploring oneself to expressing who you are to others. You can see it in everyday things from friends' Instagrams and Vines to Blogs we log on to see. We want to connect and share. The art world has gotten more accessible to everybody. I love to sit in my kitchen with tea, draw in my sketchbook then take a photo and share it on Instagram,  Facebook or my Blog. We as artists can share with each other from miles and miles away. We can become friends with an artist that is just starting out in Denmark, Rome or Oklahoma. Social media can be a another medium to express yourself. So go on! Explore! Express! Share!

Your Arty friend,
Carrie Ellen 

 BIG thanks and shout out to Carrie for her contribution to this blog!! 

 P.S. Carrie works hard on her craft please don't use any of her photos without her permission!

Want to see more of Carrie's work?! Check out her blog Carrie Ellen Art Studio and her Instagram !!!! 

 http://carrieellenartstudio.blogspot.com/

Until next time friends...Cheers!!! 

Would you like your artwork to be featured right here on BSOM?! Email us! We'd love to hear from you!  
 Check out our Contact page for more info! :)