Showing posts with label DIY. Show all posts

07 March 2016

Framin' Shells

It surely has been a minute since we've posted! Shame, shame lol. Will have to update more about what's been going down with yours truly later, but for now enjoy this...


When I'm not painting I love reimagining items + repurposing them into something lovely that I'll get to look at everyday. This  little creation, which I finally finished putting together is one of those. I upcycled a frame that was missing the glass, burlap, a couple of shells that I've collected, a little E6000, + some imagination. Fits right in with my oceany themed living room. That's right I said, oceany lol. 

Who needs to buy home decor when you can make it yourself?! Especially out of things you've got lying around or might otherwise throw away! What I'm trying to get at is take a look around you, I'm sure you've got a few things here + there that could use some lovin' + when combined can make something beautiful. I believe in your creativity people! That is all. 

Cheers!
Noonie  

18 December 2014

Noonie's | Paint Splattered Ornaments |


I first learned how to make paint splattered ornaments when I was in 6th grade, but hadn't made once since, that is up until last year. I meant to share this DIY tutorial then, but alas I ran out of time + had to make them quickly so I took no pictures! This year I made sure I'd have enough time + I'm so excited to finally share this fun, easy to do project!


05 September 2014

Noonie's |DIY Relief Print|


I've always been fascinated by relief prints. A relief print for those of you unfamiliar with the term is an art form by which one reliefs or "takes out" pieces from a flat object in order to create a design. Paint or ink is then applied to the relief so that the image can be printed onto a surface. It's one of the oldest art forms + the works that artists have created using it are amazing! In fact we've actually featured an artist here on BSOM who does all kind of printmaking, if you missed it here's her Q+A

If you happened to catch this MOTW you'd know this DIY relief print project was something I wanted to try this past week + I did just that. I'm really happy with the results + definitely plan on exploring this art form some more, but for now here are a few snapshots of my very first relief print, along with how I made it (in case you wanna make one yourself). 

Oh + in case you were wondering/didn't recognize him, the cartoon guy I drew up + printed is none other than Mac Dre, my favorite rapper. :)


Tools You'll Need:


* Egg carton or take out box

* Scissors 

* Piece of tracing paper +
A piece of paper to print your design on

* Pencil
(mechanical works best as it's
pointer than a regular pencil)

* Paint

* Tape
(optional, but helpful)


How To:

- Draw up your design on the tracing paper OR
if you're feelin' gutsy you can just draw your design right onto the egg carton.
(if this is your first relief I highly suggest you use tracing paper)

- Tape the tracing paper onto the egg carton.
You'll want to tape it on backwards with the pencil side down onto the egg carton.

- Using your pencil copy the backwards design onto the egg carton.


- Remove tracing paper + begin the relief!
Now I happened to have the little sculpting tools pictured above laying around + I used them to relief the egg carton but there are definitely other ways to relief your design if you don't have these sculpting tools on hand. As the egg carton is really soft it won't take much to relief or press in the egg carton therefore the options for what you can use to relief are pretty open. Just to give ya a few ideas you could use the pointy end of the cap of a ball point pen or even the not pointy end of a nail, as I said the options are pretty limitless since the egg carton material is pretty malleable.


Up close shot of my relief

- Once your design is relieved apply a thin coat of paint onto it.
If you put too much paint on the print you'll get these results...

Too much paint applied!
Sure you can see the design, but this was not the look I was going for.

- Press the painted side down of your relief onto a piece of paper, lift...and
VIOLA! You should have a print sitting right in front of you :)


Pretty damn easy right? I thought so!

These 2 turned out the best :)
I really like the faded effect of the 1 on the right.

Not only is this project super easy to do, but it requires tools that most of us already have laying around. Plus if you feel like you aren't good at drawing you can always just trace a design from an outside source right onto the tracing paper + create a relief print that way.

Hope you enjoy this project as much as I did! :)


Until next time friends...Cheers!!!

<3 Noonie


26 June 2014

Noonie's Wall Revamp

A little while ago I wrote about my Move + Revamp. I have big plans for my new bedroom, especially with the walls! If only I had more than 4 to work with lol. Here are my bedroom wall plans broken down.

1- Bohemian Style/Zen Doodle Pattern:
I was perusing Pinterest a few weeks back and fell in love with this design!

I'm planning on doing something similar on the smallest wall in my room so it doesn't look too busy. I will be posting my design a little down the road :)

2- Gallery of Frames


I just love love love the ever so popular gallery of frames concept. Such a cute way to really personalize an area of a room. I can finally bust out all those little knick knack and keepsakse that I've had thrown in a drawer somewhere and really show my personality and interests. Not only will I be adding my little knick knacks, but I will also be adding pieces of art I've created/enjoy, photos and any other little random things that catch my fancy. I know some people like to create a very unified look with their g.o.f. by using the same colored/style of frames but that just ain't me! I love random sporadic designs so I'm planning on using a variety of different colored/style of frames which I'm super excited about! I have started my g.o.f. project which I will be sharing with you in the future. This project is definitely going to take TIME to put together.


3- Paint a Mural

Still need to scheme up a plan for what I want to paint on one of my bedroom walls. It's going to be on a pretty big wall so the options are pretty limitless! I really like the I idea of a piece somewhat engulfing an entire wall, pieces of it sprawling out onto the ceiling but that's about as far as my scheming has come along. But I'm super excited about this future piece + how it will totally personalize my bedroom.

4- Framed Piece of Art Wall


I have a ton of art related posters that I typically hang in my bedroom, but because I am doing all these other things with my walls I'm only going to be hanging one art poster right up above my bed. Of course it's Van Gogh.

So that's my plan for the walls! Definitely will be sharing more updates + photos as it all comes together so be on the look out! :)


Until next time friends...Cheers!!!

<3 Noonie

18 April 2014

Zombie Art

I truly believe inspiration can be found anywhere, if one only uses a little imagination. Hell that's how most of the things we see and use everyday were created to begin with. Being that I am an artist my imagination is quite vast and deep, sometimes scary deep, to be honest. However, I am very thankful and grateful to have the imagination I have, as it awards me many inspiring ideas, and crazy dreams for that matter. The point I'm trying to make here is this: yes it's important to see the big picture, but it's just as important to not overlook the minute details, and to not just see something for what it is, as you just might come upon your next new bit of inspiration. 

Now that I've gotten off my soap box, lets get to the fun part, putting these ideas in use! To illustrate my point I wanted to share this little treasure of mine that was inspired by simply looking at something not just for what it is, but what it could be, merely by looking at it with different lenses.


One person might've seen the above item as garbage as it had already served it's function which was to hold a candy bar. I saw it as a really cool unique piece of art and that's exactly what it became, an upcycled piece of art. (Hence the title of this blog, the box came back to life to become a piece of art :)) For those of you who have never heard of upcycling just check out the DIY on Pinterest (or the Upcycled Notepad I posted here on BSOM), most of these projects contain upcycled materials, which are just materials that were once used for a certain function, are upcycled to be used for an entirely new function, thus avoiding the garbage can. I mean it really doesn't get much better than upcycling! You get a neat unique item out of it and you avoid contributing to landfills, thus making Mother Nature pretty damn happy too, everybody wins! 

Anyways here's what I did, as most of it is self explanatory I'm not going to go too much into detail.
 

Got my supplies all set! 
You may not have a candy bar box on hand, but that only exemplifies my point! Look around, change your lenses and I'm sure you'll find something laying around that could be turned into some pretty art, and if not pretty at least interesting. 
Conversation starter anyone?


Goes perfect with my ocean themed dining room :)

I hope this has inspired you to look at things a little differently whether it's the "garage' that you're about to throw away, or even being inspired by those pretty tiles you noticed out at dinner last night, don't overlook those details! As Nelli always says "the devil is in the details", and to that I will add "and so is the inspiration"!

Until next time friends...Cheers!! 

<3 Noonie

I am participating in Make It Mondays Link Party, so stop by if you can: links

06 April 2014

Noonie's | Upcycled "Zombie" DIY Notepad |


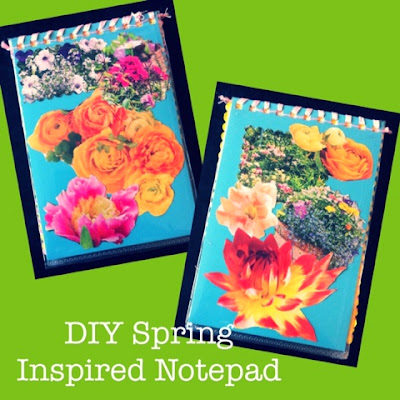
I happened to stumble upon the blog A Beautiful Mess a couple of weeks ago, and instantly fell in love with it! ABM just has so much quality content with awesome DIY tutorials, food recipes, etc. you could literally spend hours perusing their site! (Believe me I've done it!) I found a ton of DIY tutorials that I wanted to try myself, and today I finally decided would be the day to do so. I really liked their Mini Magazine Notebook DIY project so I decided to try my hand at it, except I didn't have all of the supplies the project called for so I improvised and ended up creating my own DIY version of a mini notepad. Because Spring is here I also wanted to make a Spring inspired notepad. We here on BSOM haven't done too many DIY tutorials as far as crafts go (although I did post a DIY fish decor piece that I made put of twine + driftwood last summer) but it is definitely something I would like to work on for future posts as I just think they are so much fun! :)

I should mention I was also inspired to create a mini notepad from the Art Abandonment Group, as one of the group members had made some little notepads and they were so cute! Not only were they cute, but functional as well which is another reason I loved the idea. Up until now I have only abandoned pieces of art that were just for visual enjoyment, but the idea of functional art just really struck me as it can be useful to anyone. 

So back to the mission at hand...a DIY mini notepad! Like I mentioned I didn't have all of the supplies needed to follow ABM's tutorial for their Mini Magazine Notebook so I improvised. I could have improvised in a different way than what I did so my results would be more like ABM's notepad, but I wanted to kind of do my own thing, and create my own tutorial inspired by theirs. I also decided to go the route I did with my improvising because I wanted to upcycle items I already had, and would've ended up throwing away/collecting dust had I not used it for a project, thus bringing this item back to life as a zombie (which explains the title of this post, I mentioned yesterday that all of my upcycled projects will now be referred to as my Zombie projects.) The item I'm talking about is old planner of mine from a couple of years ago. I know you've got a couple of old planners stashed away somewhere, go grab 'em and let's do a project! :) While you're at it here are the other supplies you will need (but of course please feel free to improvise!)
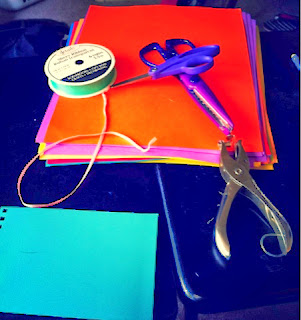
Supplies Needed:


* Old Planner/Any Old Notebook
(Pretty much anything that has a plastic backing to it that you can remove
 to use for the covers for your new notepad)

* Blank paper of any kind
(Computer, construction, lined, etc.)

* Pretty pictures/items of any kind
(Magazine photos, actual photos, whatever your heart desires!)
I decided to tack on 'items' on there because I was thinking some pretty pressed flowers would be nice too, the options are limitless! :)

* Double Sided Tape + regular tape
(Whatever strikes your fancy but keep in mind...)
Because what I was using for the covers was made of plastic I used double sided tape to adhere my pictures. I decided to use double sided tape instead of regular tape so I wouldn't have to roll the tape in order for the pictures to stick which would lead to bumps under my pictures (no bueno).
I'll explain what the regular tape is for in a moment.
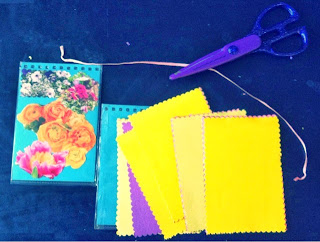
* Scissors
I happened to have 'fancy' scissors on hand so I used those as well as regular scissors, but the later is just fine too.

* Clear Sheet Protectors
I happened to have these on hand as well, although I did contemplate just using clear duct tape to cover the notepad covers.

* Ribbon of some sort

* Threaded needle
AMB's tutorial suggested embroidery thread, which is definitely ideal for this project. But I didn't have any on hand so I just used regular thread and backed it with the ribbon for support.

* X-Acto Knife
(Definitely comes in handy to get those straighter lines!)

* Hole Punch
(Could come in handy!)

How To:


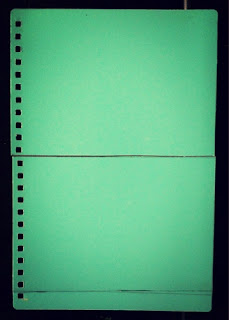
- Grab your old planner + unhinge the plastic cover(s)
 (depending on how many notepads you want to make, 1 cover = 1 notepad)


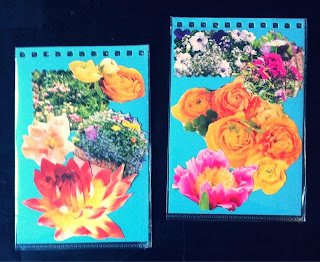
- Measure out + cut the plastic cover into 2 equal parts. 
These are going to be your notepad covers so cut them as big/small as you want,
 you just want them equal.


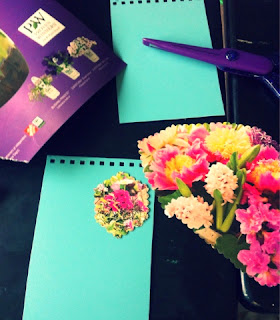
- Decorate your covers with the pictures you've chosen using your double sided tape.


- Next grab a plastic sheet protector + put one of your covers in it, cut to size. I used my regular scissors to cut out the area I needed + left a little extra space along the border. I then used my  X-acto knife to clean up the edges of the plastic sheet protector because they were frazzled at the end.

- Tape up the open sides of the sheet protector using your regular tape, cut the excess using an X-acto knife if you've got one, it'll make the job a lot easier!


- Now get your paper ready! Cut your paper to size, this is where I used my fancy scissors. The wavy edges adds a little extra somethin' somethin' plus I feel like I don't have to worry about my lines being exactly straight, which is always a good thing in my book! For the life of me I can't seem to cut a straight line very well! LOL


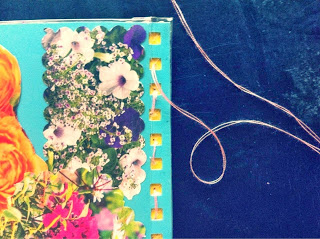
- And now the fun part...BINDING! Yes I'm being sarcastic, I'm not goin' lie this was my least favorite part of this project, but because I've gone through this once I now have a little thing called, hindsight which will save you some troubles on this part. The planner cover that I used had smaller holes (as I think many planner covers are) already punched in it, where I unhinged it. Because the holes were on the smaller side you can bet it was a pain to bind the covers together! Next time aka this time for you, I'm going to punch larger holes in the covers where the smaller holes already are to make the binding job a lot easier!! Once you've got your larger holes punched, you're going to take your threaded needle + sew together the covers weaving in + out of the holes you just punched.
Once you've sewn together your covers, take your ribbon and go through the holes with it to cover up the thread a bit. Cut off the excess and...

YOU'RE DONE!! :) 
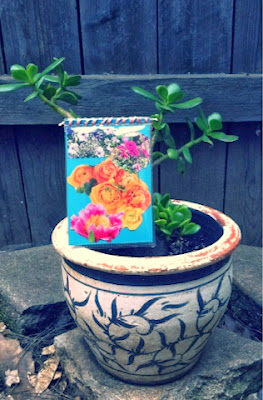
Ta-Da!! You should now have a pretty damn sweet homemade upcycled notepad right in front of ya! :)


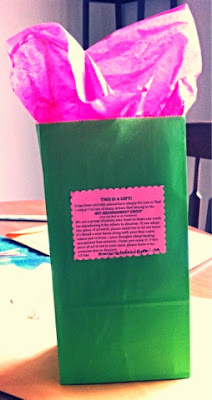
I'm quite happy with my little Spring inspired notepad, and although I love it and want to keep it for myself I intended on abandoning it before I even began assembling it, so I've gotta stick with my guns and abandon away! 

Finder's Keepers! 

Hope you all enjoyed this crafty (ha) little project! 

Let me know how yours turns out!
Comment below or shoot me over an email to: Bicoastalstateofmind@gmail.com!

Until next time friends...Cheers!!

<3 Noonie


05 April 2014

Zombie Jars

Swooped this pic of Nelli's jar collection from her jar post ;)

If you're a regular here on BSOM you'd know that both Nelli and I are pretty Eco-friendly conscious kinda girls. For this reason we both try to upcycle items that would otherwise be thrown away. A lot of these items are things that I'm sure many of you may be guilty of throwing away, specifically glass jars. You know the ones that your spaghetti sauce, or apple sauce come in? These bad boys definitely have a shelf life longer than just being the packaging for the product it contains. Nelli has written about what she does with her glass jars once they have served their original purpose, you can read that here. I've also written a couple of DIY upcycling blogs, which will be posting soon so be on the look out! Psst there's one posting tomorrow ;)

I decided I wanted to throw in my 2 cents on the topic of glass jars and so here we are. Below are just a couple of ways that I upcycle my glass jars, aka bring them back to life! Hence the name of this post. In fact from here on out all of my upcycled projects will now be referred to as my Zombie projects. (bbraaiinsss LOL)


* For my art projects!
Whether I use a jar to hold my paint water, or to even hold my paint brushes it's pretty damn handy to have one (or five) around. Hell even the jar could become a piece of art itself with just a little imagination.


* To organize my desk/studio/tools!
A glass jar makes the perfect supplies holder! Whether you fill it with office supplies or use it to organize all those different nails + screws that may be scattered about.


* Decor!
Like I mentioned you could decorate your glass jar, + display your collection of sea shells or other fragile keepsakes. It would also make a great vase for flowers.


* Food container or drinking glass!
Nelli already mentioned how she stores her food in these jars, and to that I'll add glass jars are perfect for candy too! (Who needs a candy bowl! everyone has one of those, but few have a candy jar ;)) 
These bad boys also make great drinking glasses as they are. If you really want to get fancy there are all kinds of DIY projects around that can show you how to cut glass at home to turn jars/bottles into actual drinking glasses, I found this pretty good one after a quick search online (although I haven't tried it myself yet!).


* Gift it! 
This kind of goes with the above idea, but...
A candy filled jar makes a great balloon weight! I remember an elementary school friend of mine once gave me some balloons for my birthday with a glass jar filled with my favorite candy to weigh down the balloons. Awesome idea!


* Critter catcher!
I know from personal experience that a loose lizard in your house will be very cooperative if you have a glass jar on hand to stick him into so you can put him back outside where he belongs! (Of course you'll want to poke holes in the lid before you do this!)
If you don't happen to have the lizard problem, but you do have a kid problem (that was a joke people relax), I'm sure a glass jar would be perfect for them to go catch any little critters that they happen upon.

I hope this has inspired you to look at those glass jars a little differently next time you're about to toss one! :) It's all about changing those lenses of yours, something that I think can be applied to many facets of life, and not just your "garbage".


Until next time friends...Cheers!


<3 Noonie